Import your history from another system
Move from Tangoe, Cimpl or your own spreadsheets by importing locations, inventory, past spend and contracts, so trends and bill checks work from day one.
In the app:Import data
On this page
Coming from another telecom expense system or a set of spreadsheets? Import data brings what you already have into Conduit TEM on day one. With past months in place, your trend charts, budgets and reports have history right away, and your first real bill is compared against previous months instead of starting from nothing.
Only owners and admins can import, because every import changes the whole organization. People and their extensions have their own import on the People page; see Import people from HR or your phone system.
What you can import
Go to Settings and choose Import data. There are four kinds, best done in this order because each builds on the one before:
- Locations & cost centers: your sites and cost centres with codes, parents and addresses, so everything else can be placed.
- Inventory: lines, circuits, numbers and devices, with vendor, account number, plan, monthly cost, location and the assigned person's email.
- Spend history: past months per account, or per line if your file has that detail.
- Contracts: agreements with dates, term, notice period, commitment and the accounts they cover.
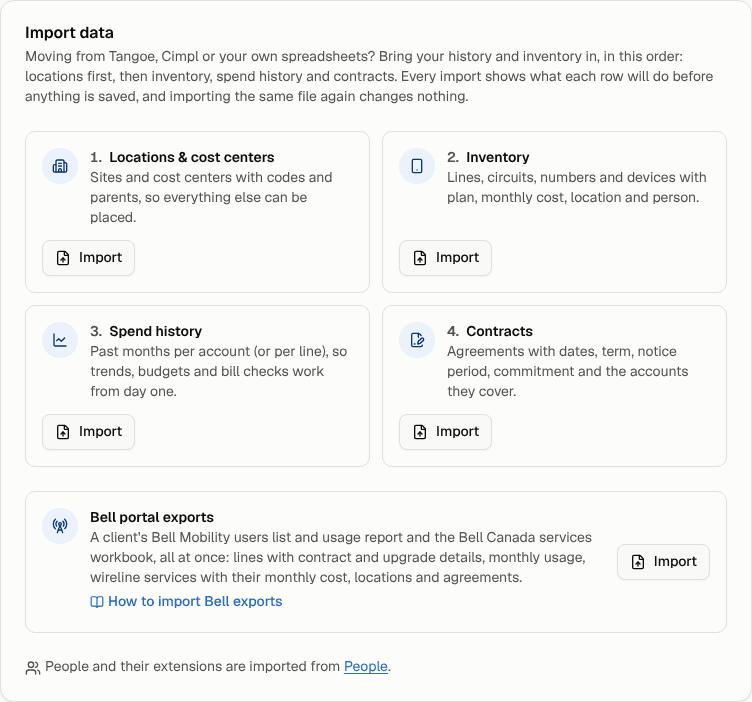
Cloud costs from AWS, Azure or Google Cloud aren't imported here. They have their own page: select Open cloud spend at the bottom of Import data, and see Import a cloud cost file from AWS, Azure or Google Cloud.
Step 1: Choose your file
- Select Import on the kind you want.
- Under Choose a file, pick a CSV, TSV or Excel (
.xlsx) file. Or paste cells copied from a spreadsheet into Or paste the rows and select Continue.
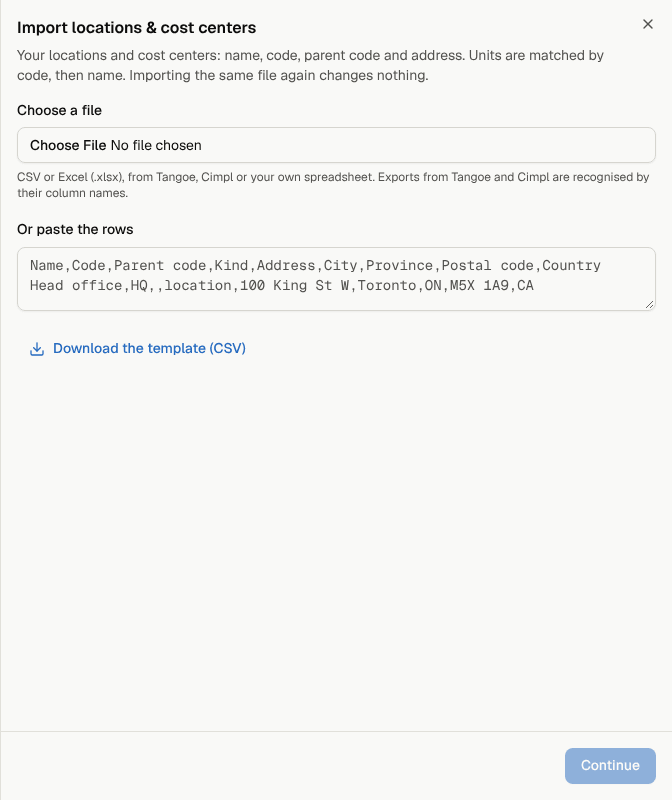
Each kind has a template: select Download the template (CSV) to see the expected columns with an example row. You don't have to use it; your own column names usually work.
Limits: 5,000 rows per import, 10 MB per workbook. Old .xls files can't be read; save them as .xlsx or CSV first.
Step 2: Check the columns
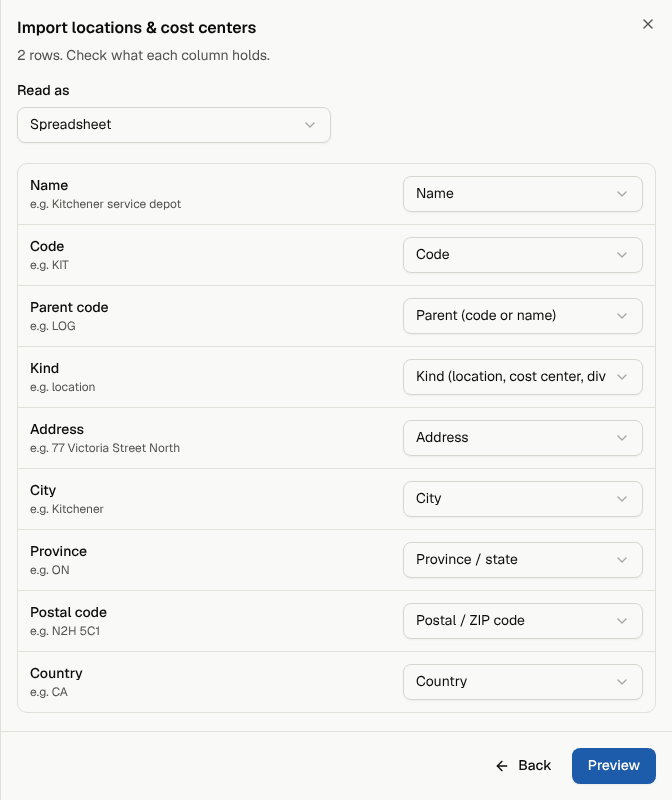
Conduit TEM finds the header row (title lines above the table are skipped) and guesses what each column holds.
- Read as shows how the file is being read: Spreadsheet, Tangoe export or Cimpl export. Exports from Tangoe and Cimpl are recognised by their column names. Change it if the guess is wrong; the columns are guessed again.
- Check each column's field and fix any wrong guesses. Choose Don't import for columns you don't need. Only mapped columns are sent.
- If your workbook has several sheets, use the Sheet picker.
Spend history with months as columns works too. A sheet with one row per account and columns such as "Jan 2026", "2026-02" or "Mar-26" maps each month column to the amount for that month. A Total column is ignored.
Select Preview.
Step 3: Preview what will happen
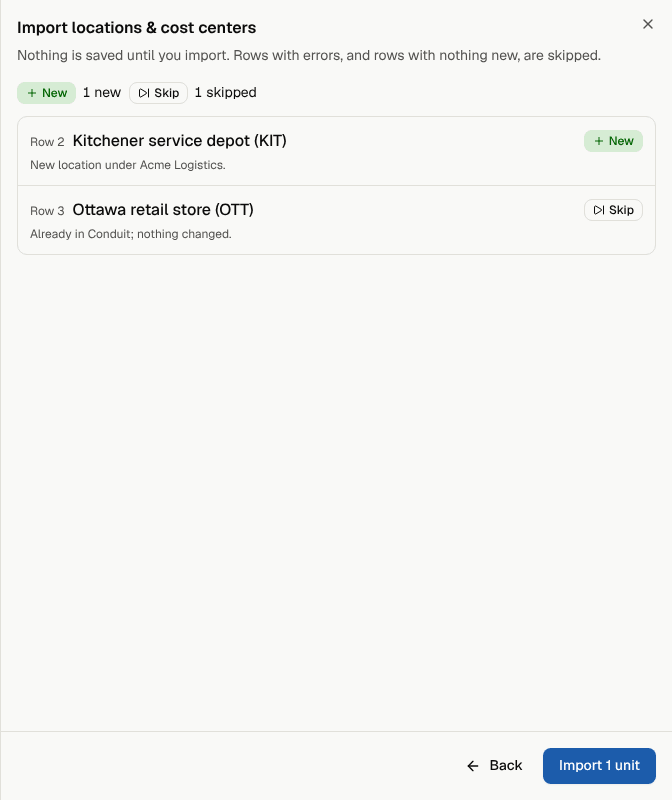
Each row (or each row and month, for a sheet with month columns) gets a badge: New, Update, Skip or Error. You'll see what will change, why a row is skipped and any warnings. Errors are listed first. Nothing has been saved yet.
Step 4: Import
Select the Import button at the bottom; it says how many records will be written. Rows with errors, and rows with nothing new, are skipped. The import runs as a single step: if anything goes wrong, nothing is saved.
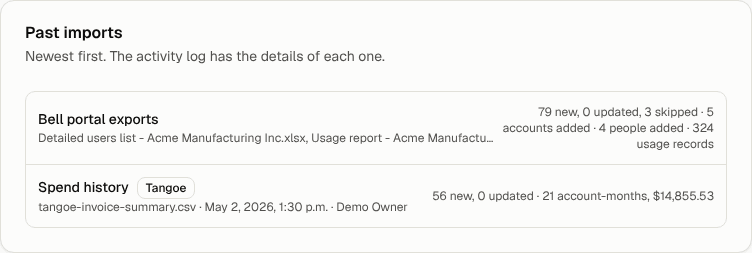
Every import appears under Past imports on the same page, with what it added and changed, and in the activity log under Settings → Activity.
How rows are matched
- Locations by code, then by name. A parent can be given by code or name. If two units share a name, use the code.
- Vendors by name. Common variations such as "Rogers Communications" or "AT&T Mobility" are recognised. An unknown vendor is filed under Other vendor with a warning.
- Vendor accounts by account number, ignoring spaces, dashes and leading zeros (spreadsheets often drop them). A new number creates the account.
- People by email. Unknown emails are warnings, and nobody is assigned.
- Lines in spend history by phone number or identifier within the account. Spend history never creates services.
- Months can be written many ways:
2026-03,03/2026,Mar 2026,Mar-26or any date. Future months are errors. - Money can be written as carriers print it, such as
$1,234.56,(12.34)or5.00 CR. - "Total" and "Subtotal" rows are skipped.
Importing again
Importing the same file twice changes nothing: every row shows Skip and the button reads Nothing to import. Blank cells never overwrite what's stored. So you can fix your spreadsheet and import it again safely.
For spend history, each account and month is replaced as a whole by the rows the new file has for it. Put every row for a month in the same file. Months the file doesn't mention are left alone.
What imported history does and doesn't do
Imported months count in every chart, report, budget and the dashboard, and the bill checks use them to spot cost spikes on your first real bill. They are history, not bills, so they:
- don't appear in the bills list, need no review and create no payments or approvals,
- don't trigger findings or emails,
- aren't included in bill, GL journal or accounting exports, so your accounts payable never sees spend it already paid.
When a real bill arrives for a month you imported, the bill replaces that imported month for its account, so the spend is never counted twice.