Company structure
Set up your locations, divisions and cost centres so every bill line lands in the right place, then view spend for any part of the company.
In the app:Company structure
On this page
Your company structure is a tree: your company at the top, then any mix of divisions or subsidiaries, locations (sites with an address) and cost centres (budget lines without an address). Every bill line, service, person and finding is placed on one of them. That's what lets you see spend for a single site, roll a division up, or limit a colleague to the part of the business they look after.
If your company is a single site, you can skip this. With only one unit, Conduit TEM hides all the location options.
Open the structure
Go to Settings and choose Structure. The Company structure card shows the tree, with each unit's code, kind and address, and how many services (svc) and people (ppl) are placed on it.
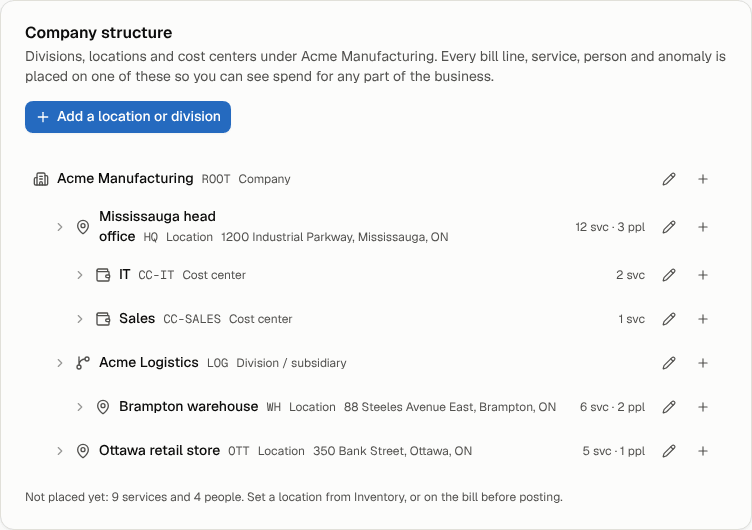
Everyone can look at the structure. Only owners and admins can change it.
Add a location, division or cost centre
- Select Add a location or division to add a unit directly under the company. To add one under another unit, select the + on that unit's row.
- Type a Name.
- Choose the Kind: Location, Division / subsidiary or Cost center.
- Add a Code if you use one, for example
WH-01. Codes show in exports and help imports and rules find the unit. Each code can only be used once. - For a location, fill in the Address. It's used to match bills: a bill line printed with this service address is placed here automatically.
- Select Add.
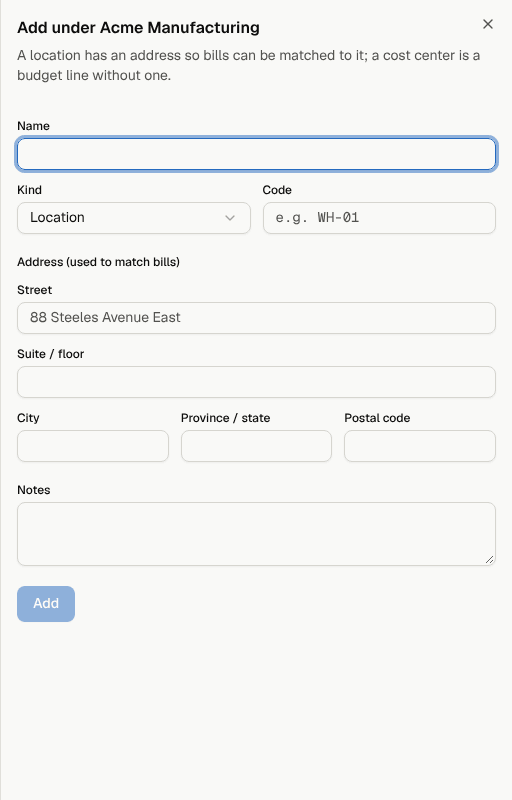
Tip: Add your locations, with their addresses, before your first bills arrive. Most carriers print a service address on each line, so a matching address places lines without any rules.
Edit, move or archive a unit
Select a unit's name, or its pencil icon, to open it.

- Change the name, kind, code, address or notes, then select Save.
- To move a unit, choose a new parent under Sits under.
- Ids in other systems holds the matching ids from Zoho CRM, Zoho Books or Zoho Billing, for your records.
- Archive retires a unit, along with everything under it. Bills already posted keep their history; new bills won't use it. Archived units are hidden until you switch on Show … archived at the top of the card, and you can Restore one from its editor.
Units can't be deleted, so history always has somewhere to point. The company at the top can be renamed but not moved or archived.
How bill lines find their location
When a bill is read, each line is placed using the most specific clue first:
- A placement rule that matches what's printed on the line.
- A cost-centre or department label printed on the bill that equals a unit's code or name.
- A printed service address that matches a location's address.
- The location the service already has in your inventory.
- The location chosen for the whole bill: at upload, by an inbox's location, or on the review screen.
- The home location of the person the line is assigned to.
- The vendor account's default location.
The How bills are placed card on the Structure page repeats this order and lists your rules.
Taxes, fees and credits printed for the whole account are only placed by what's printed on them. Otherwise they're shared out when you post, in proportion to each location's charges on that bill.
Add a placement rule
A rule says "lines printed with this belong to that unit". Rules can match:
- Sub-account number
- Service address
- Number / identifier starts with
- Bill section contains
- Name on bill contains
To add one, open the unit, go to Rules that place bill lines here, choose the rule type, type the text as the carrier prints it and select Add rule. Delete a rule with its bin icon.
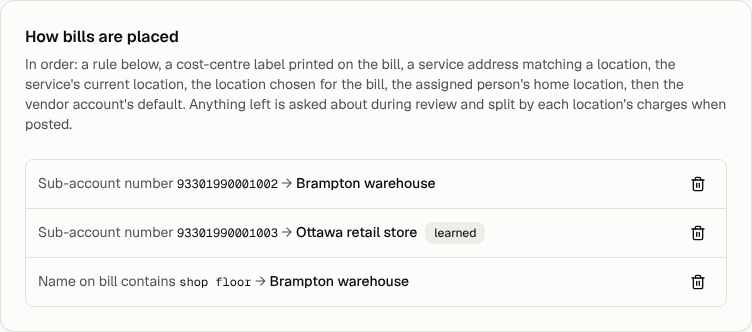
Rules marked learned were created from the review screen (see below).
Place lines while reviewing a bill
When a line matches nothing, the bill gets a review warning, and the Locations on this bill card on the review screen shows what's Not placed.
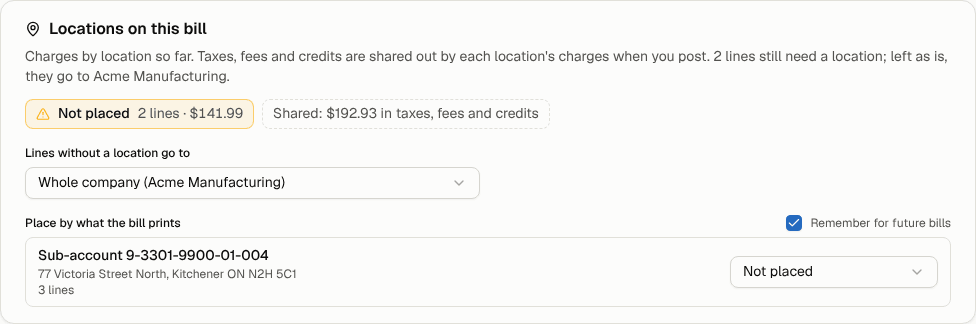
- Under Place by what the bill prints, choose a location for the sub-account or address. Every line printed the same way moves together.
- Leave Remember for future bills ticked to save it as a rule. Next month's bill is placed automatically. Only owners and admins see this option.
- Or set Lines without a location go to to choose where everything still unplaced goes.
Lines left unplaced when you post go to the bill's default: the bill's choice, then the vendor account's default location, then the whole company. Posting freezes each line's location, so moving a unit later doesn't rewrite past bills.
View one location at a time
The location switcher, under the organization name at the top of the side menu, narrows every list and chart to one part of the company. Choose All of (your company) to see everything again.
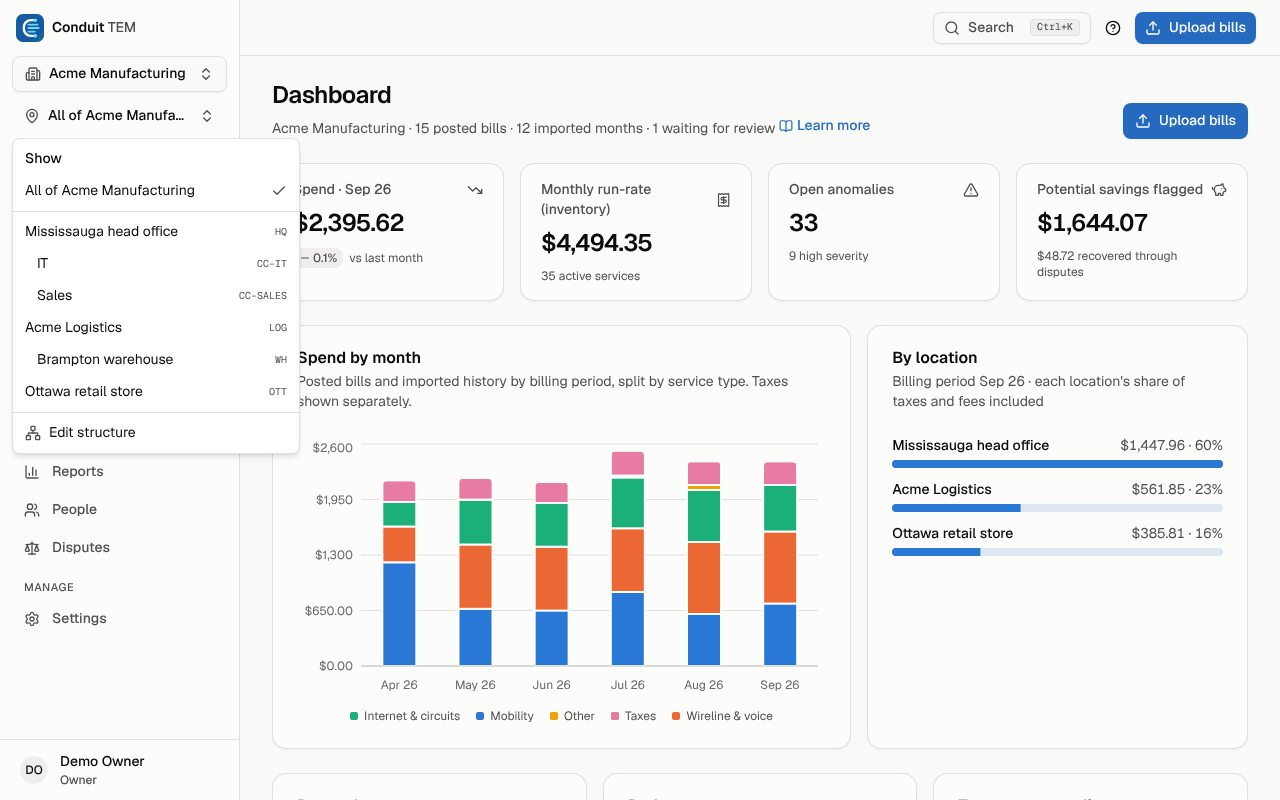
Your choice is remembered for you on this organization. It only changes what you see. On phones, the switcher is the pin icon in the header.
Members with the analyst or viewer role can be limited to one location or division under Settings → Members & invitations. They then see only that part of the company, and the switcher shows "Everything you can see".
Related guides
- Vendor accounts
- Extra inboxes for locations
- Import your history from another system: bring a whole structure in from a spreadsheet.
- Review and post a bill