Export bills to Xero
Download your coded telecom bills in a bill-import file for Xero, with locations as a tracking category, so you don't have to type them in again.
In the app:GL coding
On this page
If you use Xero, Conduit TEM can give you your posted telecom bills as a CSV laid out for importing bills, already coded to your GL accounts and tagged by location. You import the file into Xero yourself. There's no live connection between the two.
Before you start
- Set up GL coding with the same account codes you use in Xero. Xero matches lines by account code.
- Code any uncoded lines. They come through with the account code
UNCODED, which Xero will reject. - To track spend by location, set up a tracking category in Xero named Location, with options that match your Conduit TEM location names.
Download the Xero file
- Go to Settings → GL coding.
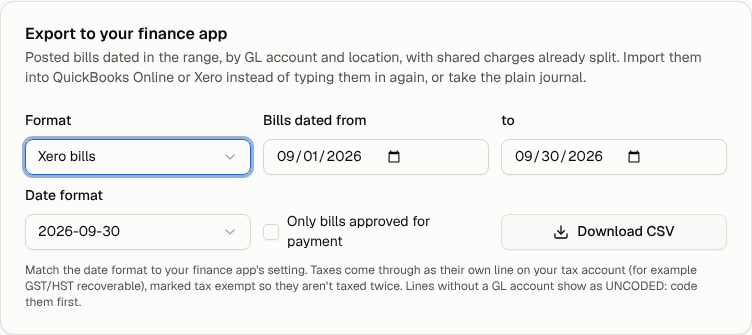
- In Export to your finance app, set Format to Xero bills.
- Set Bills dated from and to (the bill's invoice date).
- Set Date format to match your Xero organization's date setting (for example 30/09/2026 or 09/30/2026).
- Tick Only bills approved for payment if you want each bill to go over once, when it's ready to pay. Pick date ranges that don't overlap so a bill isn't imported twice.
- Select Download CSV.
What's in the file
Each row is one bill line for one GL account and location. A bill split across three accounts has three rows with the same *InvoiceNumber. Columns starred with * are the ones Xero requires.
| Column | What it holds |
|---|---|
| *ContactName | The vendor name |
| *InvoiceNumber | The invoice number |
| Reference | "Account" and your account number with the vendor |
| *InvoiceDate, *DueDate | From the bill (the bill date if no due date was printed) |
| Description | "Telecom" or "Taxes", and the location |
| *Quantity | Always 1 |
| *UnitAmount | The amount |
| *AccountCode | The GL account number |
| *TaxType | Always "Tax Exempt" |
| TrackingName1, TrackingOption1 | "Location", and the location or cost center |
| Currency | The bill's currency |
About tax: sales tax comes through as its own line, coded to your tax account (for example GST/HST recoverable), and every line is marked tax exempt. That way Xero doesn't add tax a second time on top of amounts that already include it. If "Tax Exempt" isn't a tax rate name in your Xero organization, pick the equivalent no-tax rate when Xero asks.
Import the file into Xero
The exact screens in Xero change from time to time, so check Xero's help for the current steps. In general:
- In Xero, go to your bills (the bills to pay area) and look for the option to import.
- Upload the CSV you downloaded.
- Check what Xero reports: contacts it will create, account codes it doesn't recognize, and tracking options that don't exist yet.
- Fix anything it flags, then finish the import. Imported bills may arrive as drafts for you to review and approve in Xero.
Tip: Try a short date range first, such as one month, and check a couple of bills in Xero before you import more.