Save and schedule reports
Save a report for your whole team, email it on a schedule with the full table attached, and change or delete saved reports and schedules.
In the app:Reports
On this page
Once a report shows what you need, save it so anyone in your organization can open it from the Reports page. Owners and admins can also have a saved report emailed every week or month, to members and to outside addresses such as your accountant.
Save a report
Anyone except viewers can save reports.
- Open a ready-made report or select New report on the Reports page, and adjust it. See Build a report.
- Select Save report above the chart.
- Give it a Name (for example "Monthly chargeback for finance") and select Save report.
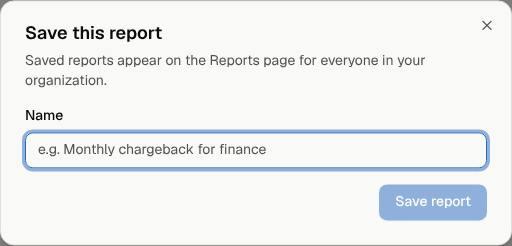
The report now appears under Saved reports on the Reports page for everyone in your organization, with what it groups by, its months and when it was last updated. Each person still sees only the parts of the company they have access to.
Saving reports is part of the Custom report builder, a paid feature. Reports saved earlier stay open, exactly as saved, on every plan.
Change a saved report
- Open it from Saved reports on the Reports page.
- Change anything you like.
- Select Save changes, then:
- Save to replace the saved report, or
- Save as new to keep the original and save your version under a new name.
Only the person who saved a report, or an owner or admin, can change it. Everyone else can still use Save as new.
Delete a saved report
On the Reports page, select the delete button on the report's row and confirm. Only its author or an owner or admin can delete a report. Deleting it also removes its email schedules; no bills or figures are affected.
Email a report on a schedule
Owners and admins can schedule any saved report. Scheduled emails are part of the paid plans (Scheduled report emails).
- On the Reports page, find the report under Saved reports and select Schedule.
- Under How often, choose Weekly or Monthly.
- Under On, choose the weekday, or the day of the month (day 1 to 28).
- Under Send to, tick the members who should get it, and add anyone else under Other addresses, separated by commas. Up to 20 recipients.
- Select Schedule.
The schedule then shows under the report, with when it goes out, who receives it and when it was last sent.
What recipients get
- The headline total and the top five rows in the email itself.
- The full table attached as a CSV file.
- The months roll forward: the report keeps its length (for example three months) and always ends on the latest month with posted bills, so a schedule never goes stale.
Note: A scheduled report always covers the whole company, whatever part the person who set it up can see. That is why only owners and admins manage schedules. Think about who you add before sending company-wide figures to someone outside your organization.
Send now, pause or delete a schedule
Each schedule under a saved report has these buttons:
- Send now: sends it straight away, for example to check what recipients will see. It still goes out on its usual day.
- Pause and Resume: stop sending for a while without losing the setup.
- Delete this schedule (the bin button): stops it for good.
To change the day or the recipients, delete the schedule and create a new one.
If your organization moves to a plan without scheduled report emails, existing schedules stay listed so you can pause or delete them, but nothing is sent and none can be resumed until you upgrade.
Who sees what
| Owner, admin | Finance, analyst | Viewer | |
|---|---|---|---|
| Open saved reports | Yes | Yes | Yes |
| Save a report | Yes | Yes | No |
| Change or delete a saved report | Any | Their own | No |
| Schedule, send now, pause, delete schedules | Yes | No | No |
Every save, schedule and send is recorded in the activity log (Settings → Activity).